

Preparation: A little different than Vale Guardian
I must start off by saying that the Vale Guardian encounter is a wee bit of a cake walk in comparison to Gorseval, so I strongly urge you to select characters who are fully equipped with Ascended gear if at all possible, rather than following on with the more lax recommendations I gave you for Vale Guardian. Gorseval is one massively hideous DPS check really, so you’ll thank me later when you’re spared the heartbreak of 1-2% wipes!
Every player will need to have unlocked Updraft Use in the Gliding Mastery chain and should be very competent in the air: My squad faced more wipes than I care to admit through incompetent gliding deaths. It’s also quite a hassle to repair if you haven’t previously beaten the Vale Guardian and unlocked the Rift Traveller mastery, so bear this in mind when selecting players. Since high DPS is so critically important, I again suggest that main characters should be used if at all possible to ensure that each player can give his or her absolute best to the encounter.
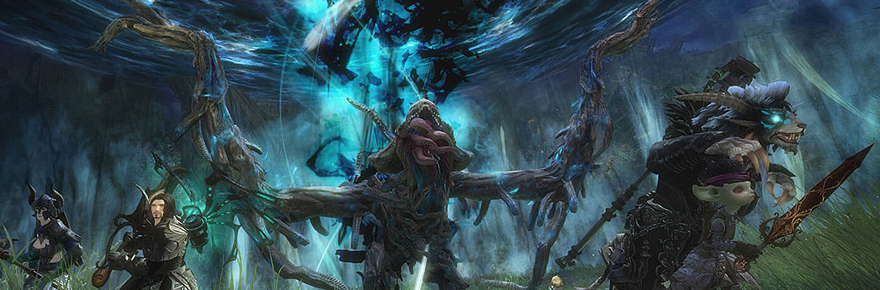
Your squad composition from the previous encounter will need some minor tweaking perhaps: Stick with your Toughness-heavy tank and preferably Druid healer as outlined before, then rework your DPS as necessary to ensure that you have two strong condi DPSers (I’d recommend Warriors or Reapers here), two solid ranged DPSers for orb clearing (this job screams Staff Tempest), and some great power DPS to get the job done, including at least one Herald.
Aside from that general breakdown, you’ll need to pre-assign three players to handle the Charged Souls with various immobilising abilities while the rest of the raid zergs each in succession, and you should also have your two orb clearers agree who shall take it on as their main priority and who shall act as backup. My previous advice regarding food and consumable use still stands: Don’t forget to bring along and use the relevant supplies as required and invest in some fancy Primers if you can afford to do so.
Gorseval stats and phase one
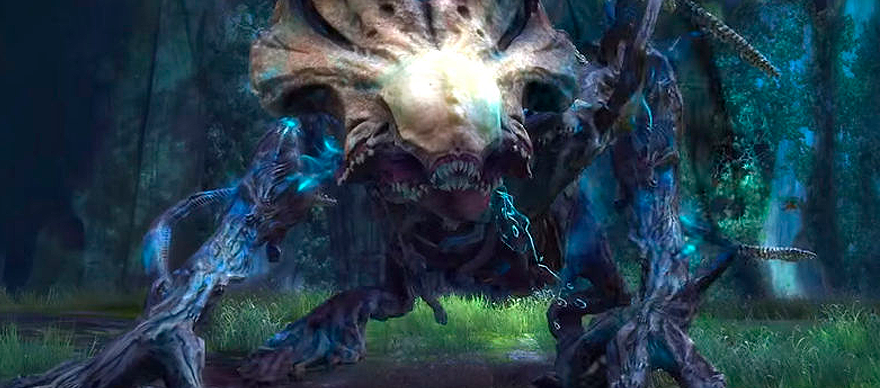
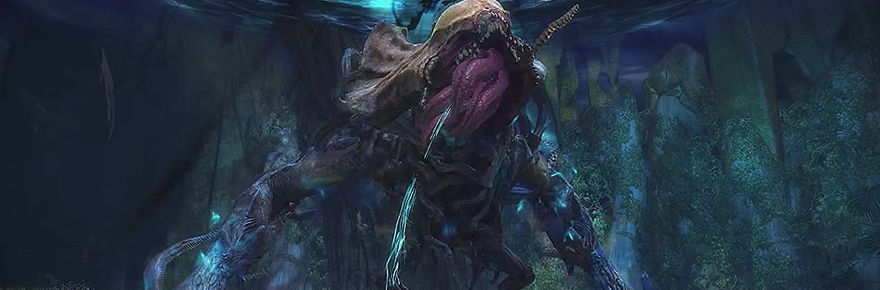
Gorseval has a whopping 21.6 million hitpoints and a seven-minute enrage timer. The fight is split into three distinct phases, the first of which takes him all the way down to 66% of his healthpool. Gorseval packs a powerful punch with his two basic attacks, a swipe and a smash, and the tank needs to turn the boss to prevent a raid-wide cleave. The smash has an obvious visual tell that should be watched for: Whenever Gorseval raises on of his arms, get ready to dodge or lose DPS to knockdown.
Ground Pound and Spirits
Adding to his basic arsenal is Ground Pound, an attack that is usually seen twice in this phase and needs to be met with crowd controlling to cover the breakbar. Again, Gorseval has a rather obvious tell and will run to the centre of the encounter map, at which point the breakbar will appear. A wonderfully vile ring of toxic black goo will appear on the platform, so players should stack on Gorseval to avoid standing in it. Players who do get caught out by the goo explosion will be dealt a significant amount of damage and will receive 25 stacks of vulnerability for the pleasure, and downed players will be defeated upon the goo explosion too.
Focus on the breakbar here to prevent Gorseval benefiting from retaliation while it’s active, and ensure you’re prepared to burst heal here if the bar isn’t going down as quickly as you’d like. If the breakbar isn’t broken in time, the entire platform fills with the deadly goo and you’ll have a definite wipe on your hands.
Immediately after the Ground Pound, expect Gorseval to summon four spirit adds to meddle with the squad. These can be either of the Enraged or Angered variety: Enraged Spirits are immune to physical damage until boon stripped while Angry Spirits can cripple squad members. Stack these pests centrally where possible to allow for cleaving and to prevent anyone from being kicked off the platform in the fray. It’s really important to get these guys down before Gorseval uses the World Eater attack that I’ll explain soon lest he consumes his minions and increase his damage with a nasty 10% buff per consumed spirit.
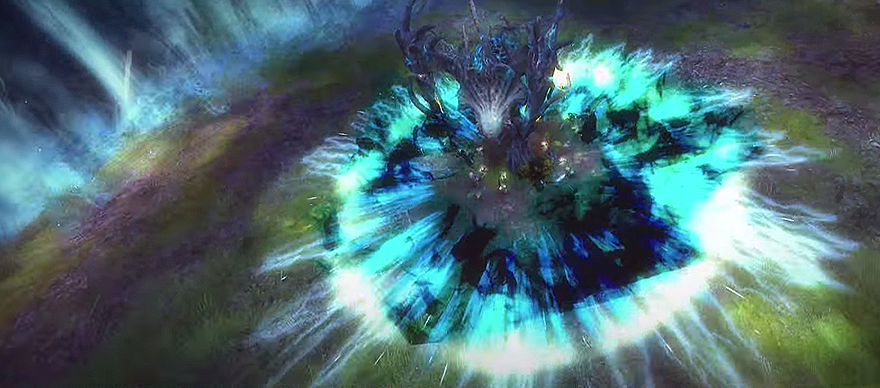
World Eater and Spectral Wall
World Eater is a roomwide deadly blast that will kill anyone standing on the platform, which is where updraft gliding comes in. The visual queue you must note here is the glow that consumes the platform as Gorseval channels: This reaches the end of the platform before the explosion, so use this signal to time your jump neatly. To handle your jumps cleanly, drag Gorseval to your chosen updraft, remembering that each can only be used once, and use cleaves and AOE to attack both the boss and the Spectral Wall as much as possible. Don’t jump too soon to prevent your group from losing a significant amount of DPS, but equally don’t dawdle and get caught out in the blast. Once you jump, glide to the updraft and hang there to build some height before returning to the platform to ensure that you make the journey safely. Many wipes happen here, so be very careful!
Phase transition: Charged Souls
At 66% and 33% of Gorseval’s healthpool, four Charged Souls appear at the four corners of the platform and will gravitate to the now-invulnerable boss. If any manage to reach him, Gorseval will once again cast World Eater, resulting in a wipe. I prefer to zerg them down one at a time while the pre-assigned players slow them down, but when I playtested with ArenaNet we split into roughly equal groups and then rejoined with weaker groups as needed. Note here that knockback and daze won’t work on the Charged Souls, so instead use cripple, immobilise, and chill.
Phase two
Between both bouts of Charged Souls lies phase two, which sees Gorseval add one new tool to his bag of tricks that we met in phase one. Spectral Darkness orbs spawn randomly across the platform that have a growing AoE that will simultaneously reduce an affected player’s damage and will increase incoming damage by 10%. This is where your ranged DPS come in: Your orb burners will clear the orb field rather than risk your melee DPSers getting too close and getting that pesky debuff. Should a player gain the debuff, they must run to the tiny golden orbs that spawn upon destroying the Darkness orbs to remove stacks.
Remembering that DPS on Gorseval is our priority, you’ll find it makes sense to assign one strong orb clearer to the task and have other ranged DPS focus more on Gorseval to prevent too much DPS being lost on orbs. Equally, you’ll want to only focus on orbs that are in your way on your route to the next World Breaker/Spectral Wall attack or those that lie on the Charged Souls’ paths by around the 40% HP mark to prevent tangling up your melee in their AoE. Efficiency and common sense are the keys to success here.
Phase three
The final third of Gorseval’s healthpool forces out of him the last trick in his bag and a modification of his Ground Pound pattern. Ghostly Traps are orange telegraphs that spawn under each player’s feet over 20 or so seconds, causing players to get enclosed in capsules should they fail to dodge or strafe in time. These capsules act as a significant way to drain DPS from an ineffective squad, so do your best to avoid getting caught in your telegraph (or my personal favourite, dodging straight into someone else’s!) and spread out before the traps are cast to avoid creating one massive danger zone.
Pay attention to the goo pattern in this phase’s Ground Pound: Where the middle was once safe in the first two pattern rotations, it isn’t here, and you’ll find yourself dodging into the middle on the third change. That roughly makes the pattern icky central ring, icky middle ring, and icky outer ring. Aside from watching your feet, you’ll need to avoid all the known dangers while you burn out the boss for a kill, so it’s best to burn quickly to prevent unnecessary casualties. Good luck!
Over to you!
Have you downed Gorseval yet? Did you do anything differently, and if so, what? What did you think of the encounter? As ever, let me know in the comments below.
 Tina Lauro has been playing Guild Wars 2 since it launched and now pens the long-running Flameseeker Chronicles column, which runs every other Wednesday and covers everything from GW2 guides and news to opinion pieces and dev diary breakdowns. If there’s a GW2 topic you’d love to see covered, drop a comment Tina’s way or mail her at tina@massivelyop.com.


