

In this edition of Flameseeker Chronicles, you’ll find a complete summary of the Living World season so far, complete with links to more in-depth coverage of each episode for those who perhaps missed a little story along the way. Remember to log into the game to bank the current episode, Flashpoint, while it’s live to save the need for a gem purchase down the line.
 The opening event of the season is the emotionally charged memorial ceremony for the hero Eir Stegalkin, which is attended by the commander and Rytlock. During the memorial proceedings, Rytlock suggests forming a new guild to help the Tyrian heroes move pass the heavy list of lost lives and severe injuries, and the Commander agrees, and so Dragon’s Watch is founded. Although Braham is notably absent from his mother’s memorial, Rox turns up with a wounded but alive Garm at her heels.
Taimi calls the commander away shortly after the formalities have ended and the focus shifts to Rata Novus, where we learn that the young genius has kept the dragon lab a secret from Councillor Phlunt and is making great headway in her dragon research. She is also keeping an eye on Glint’s egg in Tarir by monitoring ley line energy readings and by hacking the Tarir security systems. The commander is offered the now-vacant Pact leader position, but when faced with the prospect of being removed from the front line in the dragon fight the commander declines. Canach arrives seeking the commander, bringing word that Minister Caudecus has fled the palace and that Countess Anise has sent him to retrieve him in exchange for Canach’s own billet.
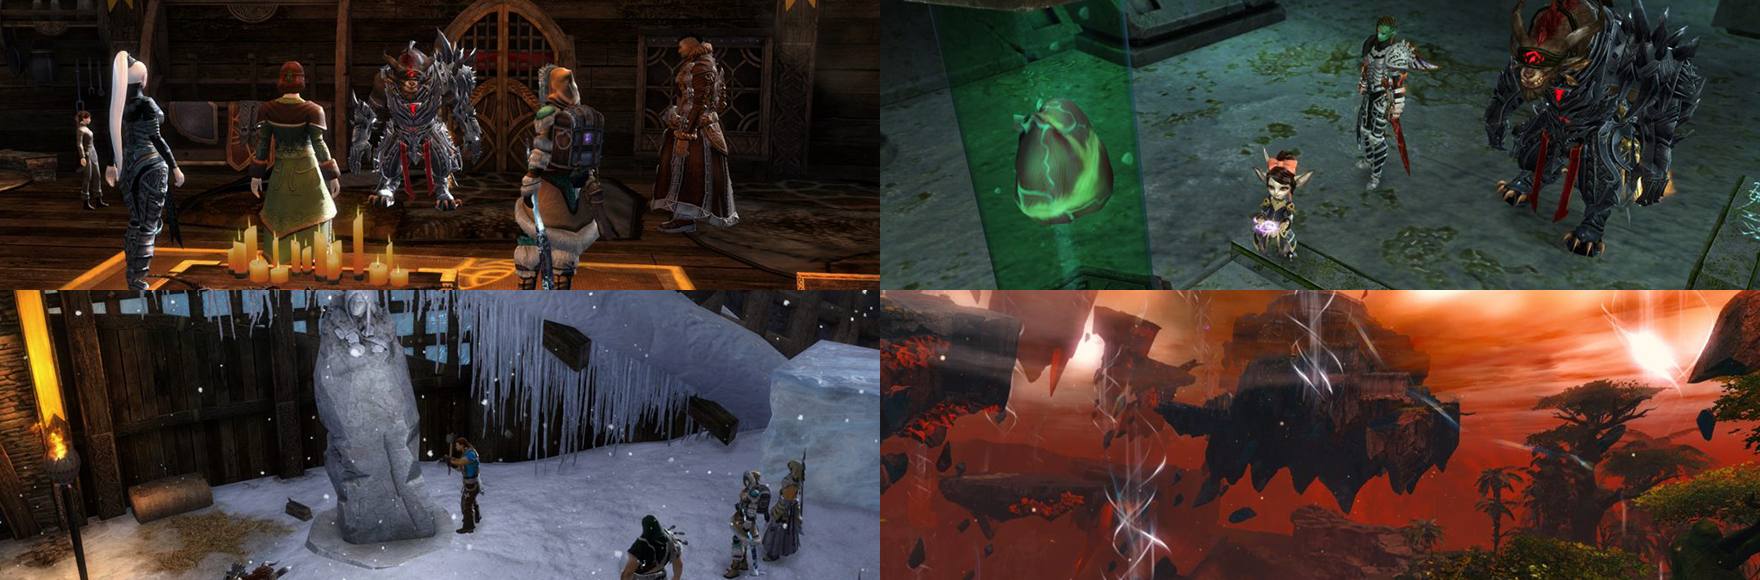 General Soulkeeper offers her airship as transport despite the commander turning the Pact position down, but en route a magical blast comes dangerously close to destroying the ship before it is somehow sucked back in again. Taimi gets in touch with the commander via a radio-like communication device she stowed with the guild leader and soon we set out to explore a forever-scarred Bloodstone Fen for the source of the blast. It isn’t long before the commander faces crazed Pact members, the White Mantle, and the vengeful spirits of those who were sacrificed at the now-ruined bloodstone, and soon realises that someone or something absorbed the bloodstone magic that was once contained in that stone.
Canach, Marjory, and Rytlock spent their time tracking Caudecus while the commander investigated the blast site and have narrowed the search to a floating Colosseum in the area. When confronted, Caudecus calls himself the leader of the White Mantle and makes his intent for the Krytan throne to be his clear. Just as the party attempts to close in on the traitor, Lazarus appears, having been seemingly brought back to life by the White Mantle and calls Caudecus a heretic before destroying his followers, but this gives the Minister a chance to escape in the commotion before Canach can detain him. The commander is interrupted in promising Canach that Dragon’s Watch will help in finding him again by Taimi, who drops the worrisome news that Primordus has become active.
- Out of the Shadows: First impressions
- Out of the Shadows: Deep-dive
This episode sees the action return to the dragon lab: After Taimi had dropped the Primordus bombshell on Dragon’s Watch, the commander thought it prudent to return to the lab to learn more from the teen prodigy. While the guild chased after Caudecus and investigated the bloodstone explosion-implosion, Taimi teamed up with Moto to repair an old Rata Novan training simulator so that she could prepare some test battles for the commander. She slips into the ensuing conversation that Braham had also confirmed to her that Jormag was also active.
Plenty of magical background information was found in this episode: Taimi fills the commander and Rytlock in on her research, explaining that ley energy was actually composed of a spectrum of magic types that could be split out, absorbed, or filtered, much like how white light could be split into its component colours. Taimi had informed the Arcane Council of Primordus’ activities and a team had been sent out to the Fire Islands to research the dragon’s activity, but word came back while the commander was visiting that the destroyers there were far stronger than anticipated, having been powered by the rogue death and plant magic let loose by the two dragon deaths seen in the Personal Story and Heart of Thorns, and that the researchers were in grave danger.
More bad news washed up as Rytlock was detained by some rather embarrassed Black Citadel toughs to account for his time in the Mists to his superiors, so the commander heads to Ember Bay to investigate the empowered destroyers. After stumbling across the Asuran camps and getting to grips with the old Mursaat ruins and volatile nature of the environment, the commander helps the local Skritt at their camp and is eventually granted access to their leader, Rock Face, who turns out to be a tragically shattered stone-bodied dwarf called Rhoban who has found himself bodiless and surrounded by gormless Skritt.
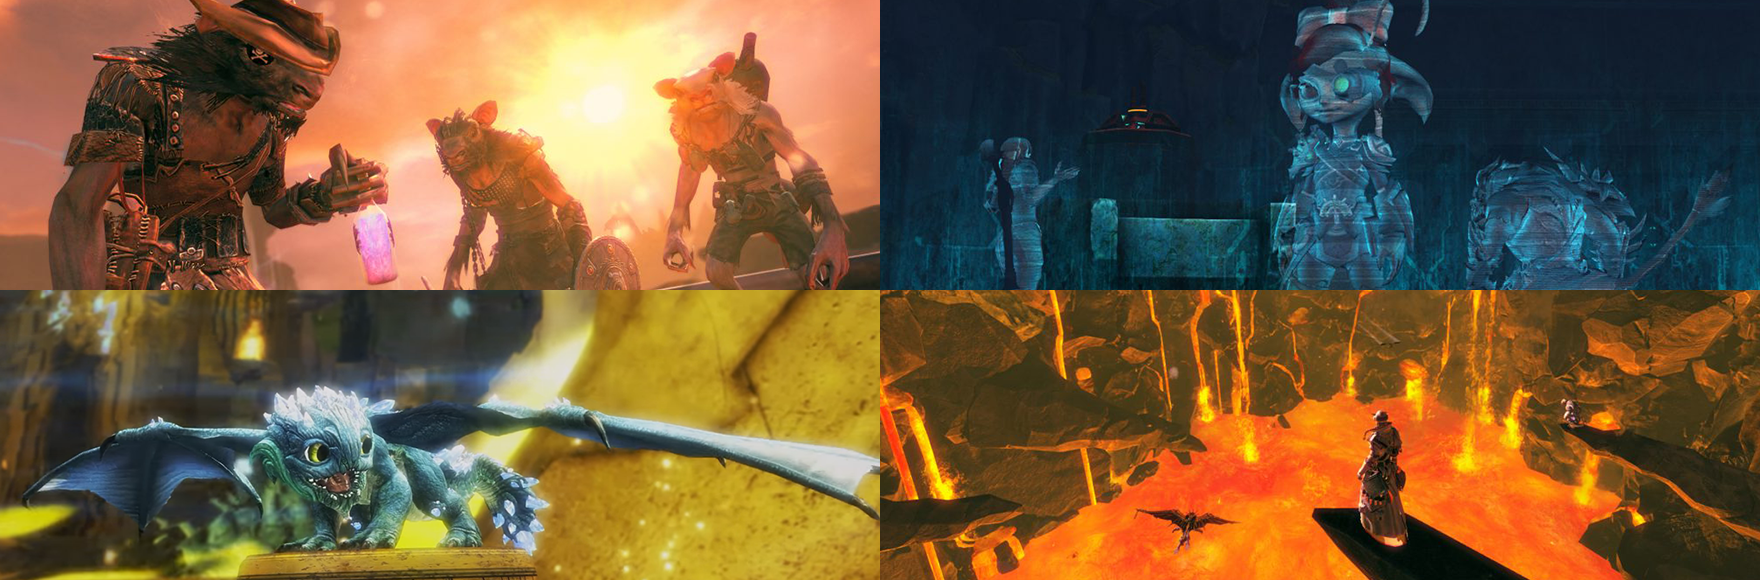 The commander is tasked with using four ancient dwarven artefacts to release the tectonic pressure underneath the island before a volcanic eruption destroys the area. The task is soon completed and the island is made safe, and the commander then sees a vision granted by Glint’s egg that makes clear that it is about to hatch. Rushing back to Tarir, the commander enters the egg chamber to witness the hatching, since only they are attuned to the hall. Caithe and Marjory wait outside while the hatchling makes her way out of the egg, but the destroyers soon swarm the chamber and threaten to overwhelm the lone commander and the prone hatchling.
Lazarus appears and, much to our surprise, helps to defend the hatchling while Ruka reestablishes the shielding on the egg chamber. Lazarus confesses a desire to side with Dragon’s Watch against the great threat, and a curious Marjory decides to shadow the suspicious Mursaat against the commander’s advice and without sending word to Kasmeer. The commander asks Caithe to stand watch over the baby, who is called Aurene, and Caithe is relieved to be in a position of trust again after her past actions.
-
- Rising Flames: First impressions
- Rising Flames: Deep-dive
Aurene is growing quickly in both power and precociousness and her Tarir guardians wish for her to be trained in the ways of compassion, kindness, and goodness. Since the baby dragon is so well attuned to the commander and sends visions to the guild leader to gain attention, there is no better person to fill the teacher role. After some fun with the cute little dragon baby, the commander is contacted by Taimi, and dragon talk soon gives the Asura the idea that perhaps she can pit Jormag and Primordus against one another.
Taimi needs samples to further her dragon magic research and to ensure her hypothesis regarding opposing magic strains is correct, so the commander heads off to the Shiverpeaks to both touch base with Braham regarding Jormag and Dragon’s Watch and also to help Taimi out. The commander learns in Hoelbrak that Braham is in search of a powerful scroll with which he hopes to enchant his mother’s bow in the Far Shiverpeaks and that coincidentally exactly the sort of corrupted Icebrood the commander is looking for can also be found there.
The commander heads north into the Bitterfrost Frontier, armed with Koda’s Flame to make the route to the Sorrow’s Eclipse Sanctuary safer. The commander is warned off the area by kodan and quaggan alike but remains undeterred, and eventually, a wise quaggan reveals that the Sons of Svanir hold the secret to surviving the bitter cold that usually would kill those who venture any further north. The commander uses the art of disguise to get the recipe for the anti-cold elixir from the Svanir and brews it, using it to gain access to the Bitter Cold.
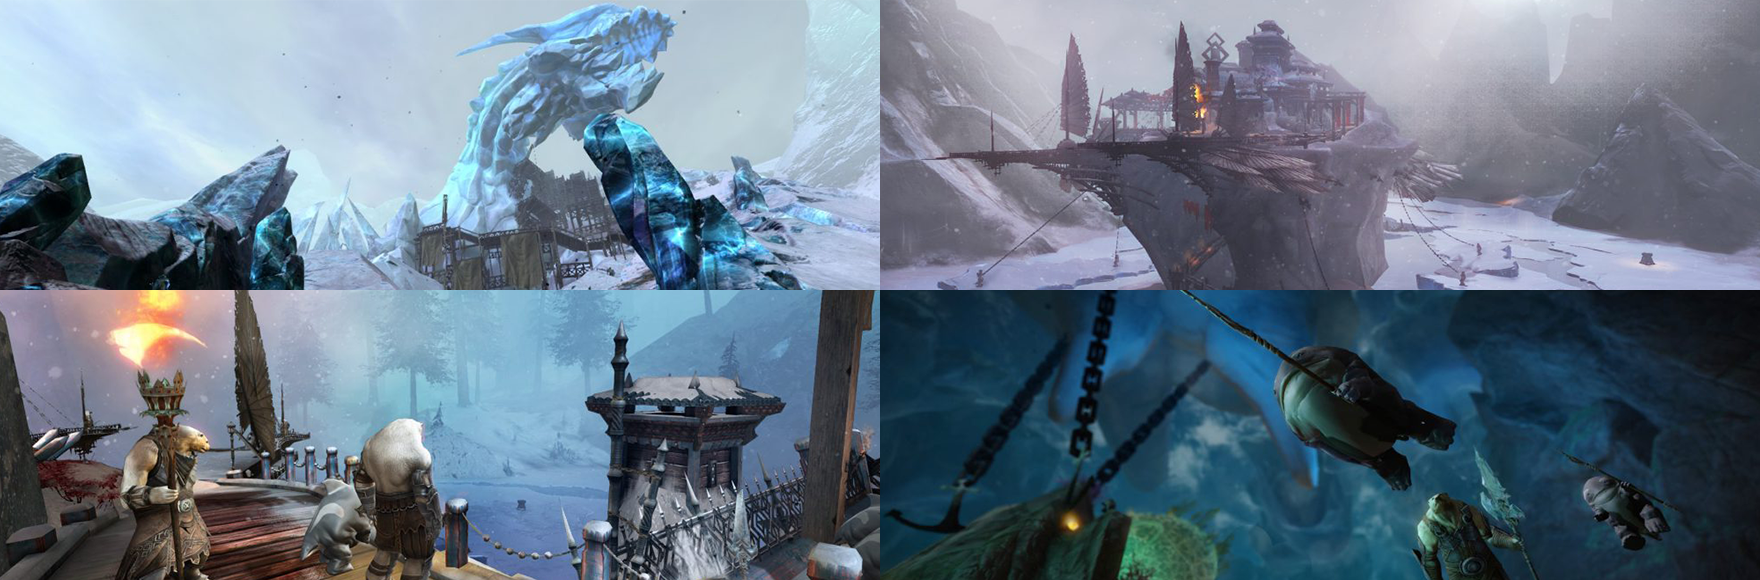 Within the cavern behind the Bitter Cold waterfall, the commander locates and kills a corrupted Icebrood and gets the samples Taimi needs, but word back at camp is that Braham is being pursued by the Svanir because they believe he is the one who stole the elixir recipe. Knowing that Braham is in trouble, the commander heads out once more to find him and soon comes across Braham, Rox, and Garm in another cave. A cold and distant Braham is disinterested in the commander’s apology, uncaring about any news of Primordus, and overtly angry about the formation of Dragon’s Watch, feeling that abandoning Destiny’s Edge is a slight against those who lost their lives for the guild’s mission.
Eventually, the party stumble across a great ice beast that is guarding the mystic scroll Braham seeks, and the young Norn risks the lives of his dear friend Rox to get it. He imbues Eir’s bow with the powers granted by the scroll and explains to the commander that he plans on cracking Jormag’s tooth in Hoelbrak and bringing the Norn to great victory after a bloody battle against the ice dragon. The commander is totally opposed to direct combat against any more dragons while the possibility of a lossless win via Taimi’s dragon research is still on the table, but an angry and hurting Braham doesn’t listen and storms off, heading straight to Hoelbrak and cracking the tooth in front of his people.
- A Crack in the Ice: First impressions
- A Crack in the Ice: Deep-dive
Queen Jennah and Countess Anise have since been informed of Caudecus’ treachery and escape, so the commander is summoned to Divinity’s Reach to meet with the Regent and to attend a ministerial gathering in the human capital. Jennah sends the commander around the court to both listen to and mingle with the ministers to detect further dissent in the ranks as well as to remove enemy listening devices from the court. Emboldened by the brazen actions of her enemies, the Queen gathered the ministers together and announced that the council would be suspended until further investigations were conducted into its members. As the ministers began protesting the decree and the White Mantle traitors among them took up arms, bloodstone ballistics began to smash into the keep, but the talented mesmer queen shielded the city from the onslaught with a massive dome of propulsion magic.
The commander aids the Queen in fighting back the assault on her home and Minister Estelle attempts to assassinate Jennah, but the mesmer effortlessly dispatches her and her White Mantle lackeys with the commander and a recovering Logan Thackeray by her side. Logan ventures out to Lake Doric to co-ordinate the Seraph, realising that the Queen’s dome had very real limitations despite its impressiveness. The commander is soon tasked with assessing the area and tangle the enemy troops wherever possible. As soon as Lake Doric was more or less manageable again, the commander returned to Jennah to determine how best to deal with Caudecus and his White Mantle usurpers once and for all.
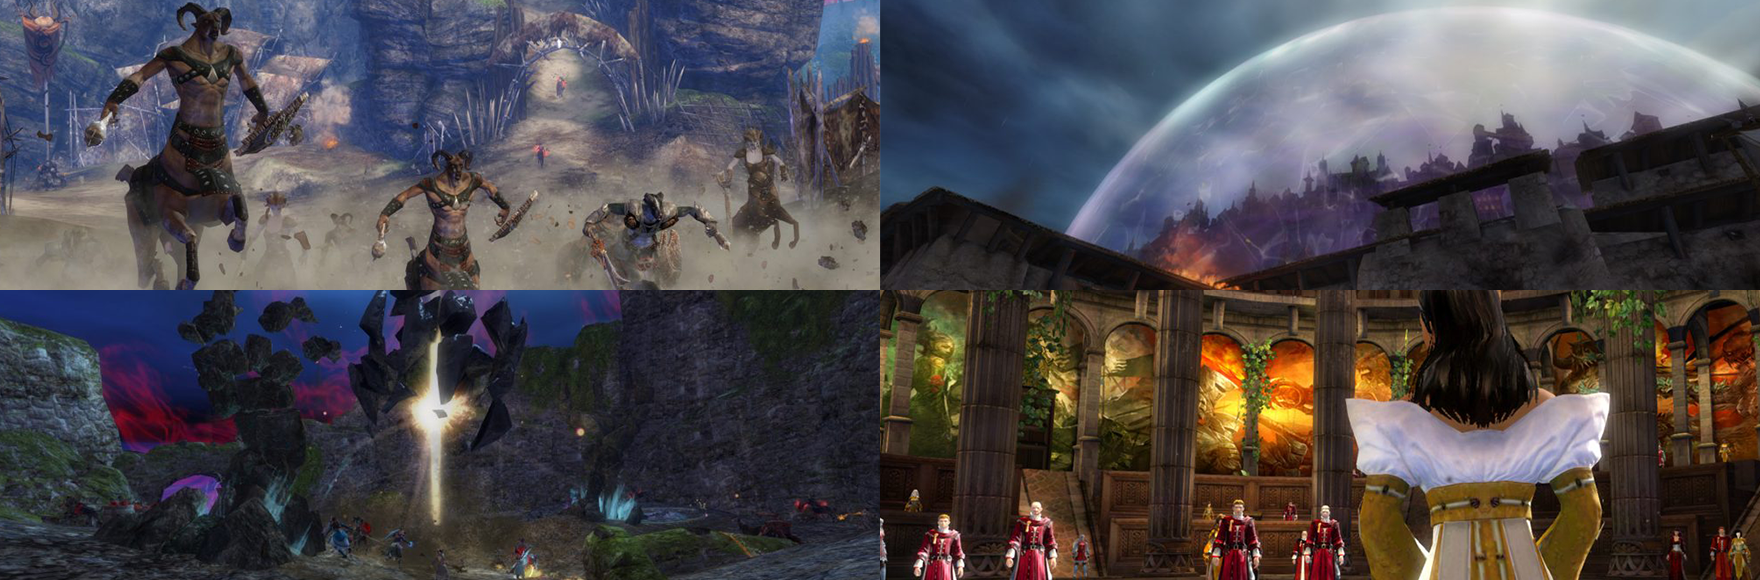 Caudecus’ daughter Demmi proves to be the lynchpin in the final move against Caudecus: The traitor retreated to his manor and the young woman has the knowledge and inclination to get Jennah’s people, including the commander, inside. Alongside Anise and Canach, Demmi and the commander confront Caudecus, who is overflowing with bloodstone corruption at this point, and he shoots his daughter dead in the resultant encounter before he is vanquished by the party. Within the manor, the commander stumbles across Caudecus’ secret notes and discovers that Lazarus is, in fact, an imposter and that Jory is in more danger than expected since the pretender was who had actually absorbed the bloodstone magic from the Fen explosion.
While the commander handles the White Mantle issue, Taimi begs Braham to give her a little bit of time, so he reluctantly agrees to survey Jormag before launching an all-out assault on the ice dragon, which buys Taimi time to attempt to build something that could pit the dragons against one another. Finally, Countess Anise is a woman of her word and releases Canach from her servitude, instead opting to take on a repentant traitor to the crown who wishes to atone for her involvement with the White Mantle.
- The Head of the Snake: First impressions
- The Head of the Snake: Deep-dive

The current episode begins with Taimi calling the commander back to Rata Novus to discuss a breakthrough she has had in her dragon research: Taimi believes her dragon-smashing device is complete and wants the commander to see it tested. Upon arrival, a tetchy but nevertheless warm Kasmeer greets the player character, jibing about letting Jory get herself in such a dangerous predicament (while admitting that Jory is unstoppable when she sets her mind on something) and also reprimanding the commander for her lack of invite to Dragon’s Watch. She joins the guild in the same breath, however, and the pair moves along quite jovially until they walk into Taimi’s latest calamity.
Test subjects are loose in the lab and the pair quickly help a frazzled but excited Taimi contain the situation again. Phlunt and his lackeys delay proceedings somewhat until the commander convinces them to leave for their own safety, but no sooner do they agree to vacate the area then a worried Jory barges in and says the fake Lazarus is incoming. She quickly fills the assembled Watch members in on events with the imposter: The fake carried a mirror with him that Kas suspects in the secret key to his disguise, so a plan is soon made to unravel the illusion and reveal Lazarus’ true identity.
Lazarus has shut down the waypoint exits and Phlunt’s krewe is trapped, so Taimi is forced to reveal the existence of the dragon lab to get the researchers to safety. Lazarus chastises the commander for not informing him of the existence of Taimi’s device and attempts to approach the contraption, which triggers the mirror trap that Kasmeer set up for him. Lazarus is revealed to be Balthazar, the god of war, and an awestruck Kas is dumbfounded by the revelation and fails to save Jory from his ire as he coldly blasts the necromancer before making off with Taimi’s machine. She flees the scene, too upset by acting against one of her gods and torn up about letting Jory come to harm to help locate him.
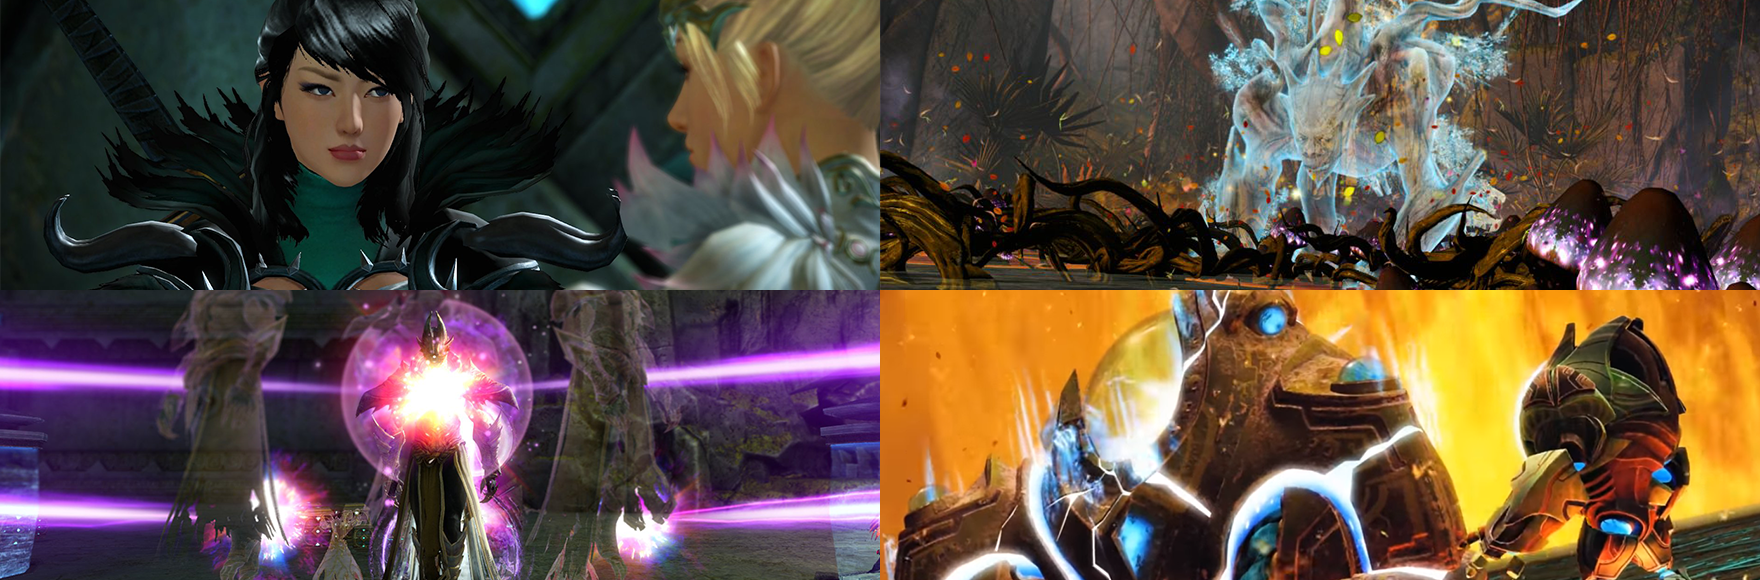 Taimi has cleverly fitted her device with a tracker and so the commander soon ends up chasing Balthazar to Draconis Mons, the suspected home of Primordus. With the reluctant help of local druidic spirit Nettleblaze, who simply wishes for everyone to leave Draconis Mons in its natural state, the commander begins a quest to free four other druid spirits from cells made by Zinn after Rata Novus fell in exchange for their protective blessing that would allow the commander to enter the Titan’s Throat after Balthazar without perishing. Before venturing into the cavern, however, Taimi uses the communicator to warn the player character that new tests have revealed that killing more dragons would cause such magical instability that Tyria would surely be destroyed.
Upon entering the Titan’s Throat, the commander stumbles across Taimi in a new-and-improved Scruffy 2.0 and the pair head deeper into the cavern to find the god before he deploys the machine. They find Balthazar with Taimi’s machine, using it to pit Jormag’s ice energy against a now subdued Primordus. With no time to lose, the pair attempt to engage the dog, but he chooses to deploy his hounds to tangle with the commander instead.
With no other choice, Taimi decides that she must destroy her most powerful creation before it’s too late and overloads her device, but Balthazar escapes in the explosion having absorbed yet more latent dragon energy as the commander and Taimi were immobilised and knocked back in the action. Primordus — and presumably Jormag — now lie dormant, showing no signs of immediate activity after the ordeal, and an even more powerful Balthazar is on the loose with only one aim, to destroy Tyria in a fit of revenge we don’t yet fully understand.
- Flashpoint: First impressions
- Flashpoint: Deep-dive
Over to you!
I’ve already shared my predictions for the final episode with you, but I’d love to hear your thoughts on the matter. How do you see the story unfolding in the near future? Have you any ideas of how the season finale will lead us into the next expansion? Share your ideas with me in the comments.
 Tina Lauro has been playing Guild Wars 2 since it launched and now pens the long-running Flameseeker Chronicles column, which runs every other Wednesday and covers everything from GW2 guides and news to opinion pieces and dev diary breakdowns. If there’s a GW2 topic you’d love to see covered, drop a comment Tina’s way or mail her at tina@massivelyop.com.


