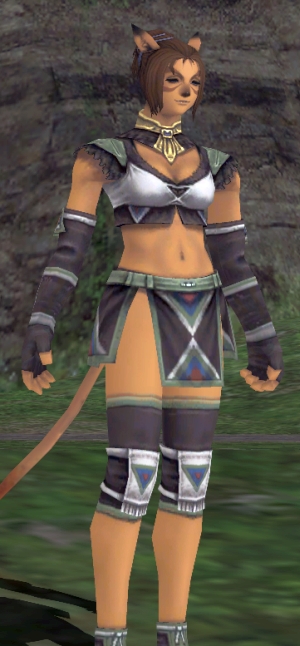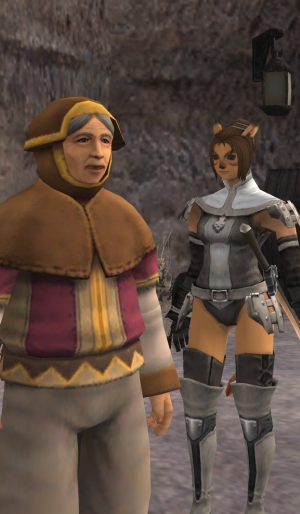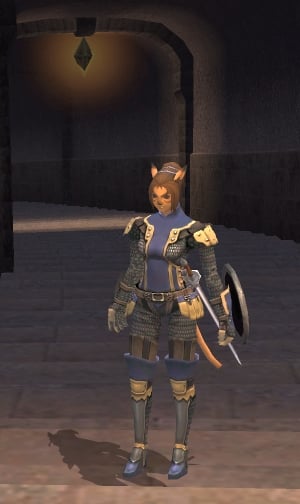
If I have to summarize, in brief, how much Final Fantasy XI has changed since its launch in the United States? In half an hour before leaving the house I made a character, started the first nation mission, and reached level 6 in the process of smacking six bees. Most of the way to 7, at that.
This may not seem like much of an accomplishment, but if you played the game before your remember it primarily for being insanely brutal and slow. The idea of reaching the limit breaks in the course of a month would require hardcore play and persistence along with lots of high-end help, which is why I specifically stated I’d be getting none of that. My playtime with this characters sits at around 9 hours right now, which is a fair chunk of time, but it’s not much when spread over the course of four days.
But yes, I am now ready to pick up my advanced jobs helped significantly by the fact that my adventure started in Windurst. So let’s start talking about the mechanics of the game, how you can end-run so many parts of the system now, and how bad the game still is about telling you these things.
 For example, the very first thing you should do after you get control of your character – the absolute first thing – is open up the Quests menu, scroll down to Objectives under Records of Eminence, and accept that request. Records of Eminence is a huge part of the game’s leveling and play experience, because clearing objectives awards you with experience (useful) and Sparks (used to buy leveling gear, which is also useful). Many of them are also repeatable, making them even more useful!
The game never tells you they exist.
I don’t mean that the game’s tutorial is bad, I mean that there is literally no tutorial that points you here. The first objective is a tutorial, but you would never know to get that tutorial unless you were already looking for it. It’s like making the first page of an instruction manual a splash page saying “PLEASE READ THIS MANUAL”; you can’t implore people to get the tutorial with a system that they don’t know without the tutorial.
So consider this your tutorial. Do what I just said to do, and then when you’re about to grind in an area, be sure to set your objectives accordingly. Every region in the game has an objective to vanquish 10 enemies within the region that repeats endlessly; you can also set repeatable objectives to vanquish a large number of enemies in total, a daily objective of 30, repeatable objectives for spoils (useful if you know what you’re fighting drops common items like specific types of crystals or Beehive Chips), and objectives for damage dealt. Checking and setting your objectives alone does a lot to improve your leveling speed and control.
Your second goal, especially now, is to step up to the Trust NPC and take care of the Trust quest. Each city has a different NPC responsible for this, but all of them have the same format: you go talk to a different NPC, gain the ability to summon them as a companion, step outside, summon the companion, then talk to the NPC one more time. From that point on, the Trust NPC can be traded any item labeled as “Cipher: (Name)” to learn another Trust companion.
Trusts are super-useful because they’re functionally AI partners that work like fully-leveled player characters but don’t decrease your experience gains at all. Several of them work to provide other useful benefits, like passive experience bonuses or accuracy boosts. Right now, you should do everything in your power to pick up Cipher: Kupofried, who has a passive Experience-Up effect. (There are Records objectives that unlock lots of useful companions early on, so you’ll always have access to a tank, a healer, and so forth.)
The login campaign also has a bunch of Trusts on offer, several of them good; I picked up Teodor to serve as my damage dealer and have been duly rewarded.

Once you’ve done all of that, you still aren’t done right now; we’ve got the Adventurer Appreciation Campaign running, and that means you want to get yourself an Echad Ring. This ring is absolutely absurd. It’s a huge boost to your experience gains like some of the other experience-up rings, but this one is better because it’s a bigger bonus and cap (150% increase with a cap of 30,000 XP) and it’s eternal. It has a two-hour recharge time, but if you were told you could get 30,000 XP every two hours, would you say no?
Of course not.
“Do we actually leave the city now?” Well… one last stopover, touching the Survival Guide in your home city. (These let you teleport between them very cheap, which makes for effective travel around an expansive world map; touch home points for the same reason.) Theoretically you probably already did, the Trust quests require level 5, but you are now actually equipped enough to step outside. And start your quest, which involves… totally ignoring the opening missions and heading for Selbina or Mhaura.
Yes, the first mission you should be advancing are the Rhapsodies of Vana’diel missions, which are tucked away and easy to miss. (You get them kicked off when you zone back into the city after leaving for the first time.) The Rhapsodies missions give you key items which make the game massively faster and easier to advance, and they also unlock lots of other benefits… like making your subjob much faster to acquire. And they’re tied into the storyline of every other mission, so they function like a meta-tutorial as well.
Again, this is something the game doesn’t tell you. I understand that the game isn’t meant to be a directed questing experience, but the lack of guideposting for the game now is utterly terrible; it means that I have to sit here and explain all of these things to you instead of letting you just, like, figure out how to do things. It doesn’t improve immersion, it makes the game grindingly incomprehensible if you don’t know and trivially quick if you do.
So your first objective is getting from your starter city to Mhaura or Selbina. You’ll also want to earn some tabs from Fields of Valor, which is picked up in Field Guides located right outside of each city; however, since you’ll be taking a long journey first, you probably won’t be hanging out long enough to clear most of those objectives. Try to pick one out as you can, but don’t stress over it too much. When you do more grinding, you can pick up more.

Here, let’s give you some directions, keeping in mind that you should be summoning Trusts as you move between zones and killing things along the way.
- Bastok: Head all the way west in South Gustaberg, then head north until you cross into North Gustaberg. Hugging the northwest side of Konstacht Highlands will put you on the right path; the exit to Valkurm Dunes is in the northwest corner. From here you’ll want to travel through the tunnel (the bats in the tunnel aggro to sound, but they’re weak and easily dispatched) along to the west, heading toward Selbina just south of the zone outpost.
- San d’Oria: Head straight south through West Ronfaure, then follow the road in La Theine Plateau to the southeast to Valkurm Dunes. Once you’re in Valkurm Dunes, Selbina isn’t all that far to the southwest.
- Windurst: Head north in East Sarutabaruta, hugging the western edge a bit until you’re at the northern end of the zone, then head east. The exit to Tahrongi Canyon is in the northeastern corner; from there, just sticking to the eastern wall and heading east brings you to Buburimu Penninsula. Head east through the narrow mountain pass region, then move southeast to reach Mhaura.
In all of the above cases, you’ll want to avoid aggro, but there isn’t a lot to dodge there. Goblins and Orcs both aggro by sight (avoid being in front of them) and both Quadavs and Yagudo aggro to sound (don’t get too close), but you can probably safely kill your way along until you get to Valkurm or Buburimu. You might even be able to kill through those if you’re cautious.
 From there, Mhaura will send you back to Tahrongi to kill Pygmaiois, while Selbina will send you to Konstacht Highlands to kill bees. Both drop an item you need, and you’ll need three in total; getting those three items lets you advance the Rhapsodies mission. Talk to Vera (in Mhaura) or Isacio (in Selbina) once you’ve traded those three items to unlock your subjob, then continue following the story along until you are told to go meet with Lion. That gets you the (very useful) Rhapsody in White and lets you grab the survival guide in Norg, which is otherwise a pain and a half to get.
All of the above describes my path, and as you can imagine, a better-guided game would have told you to do all of this stuff. This is not a well-guided game. I cannot stress this enough. But from here you can use the survival guide or a home point in Norg to get back to your home city, then start using your new subjob, and start the path of… leveling up enough to get to Jeuno.
This part hasn’t changed too much, actually. If you’re heading to Jeuno from Windurst, you actually have a minor advantage in that you can head over to the Meriphitaud Mountains to farm Gausebit Wildgrass along the way; otherwise you have to detour for farming. Fortunately for my poor typing fingers, the path to Jeuno is pretty clearly marked along roads; you can, again, either dodge aggro or work your way up to killing through the zones until you reach the central city.
After my own trip to Jeuno, I unlocked my chocobo mount (which is why you need those four Gausebit Wildgrass), unlocked the “mount” ability (which is far more useful if slightly odd in its ubiquity), and finished doing the little grinding necessary to reach level 30. Hooray! Now it’s a matter of unlocking and deciding which advanced job to pursue, but fortunately for me, several options present themselves. My goal here was to stick to jobs that I haven’t leveled a great deal in the past, so please, make your voice heard in the comments down below as I decide what to get to higher levels.
CMA: Which advanced job should I take?
- Paladin (16%, 16 Votes)
- Dragoon (19%, 19 Votes)
- Samurai (23%, 23 Votes)
- Dancer (42%, 42 Votes)
Total Voters: 100
 Perhaps the most important question here, though, is how did all of this feel? After all, the whole challenge here was not using any of my extant resources to accomplish this. Was it miserable doing so?
No. Not only was it not miserable, it was… honestly pretty much fine. I’m not going to say that it was a smooth and easy process, but because I knew what to do I was able to blast through a whole lot of content in short order. There’s still a lot I haven’t done yet, but it feels approachable and doable rather than overwhelming, and while I recognize that this would be easier with high-level help, it doesn’t feel impossible or insurmountable at all.
Feedback, as always, is welcome in the comments or via mail to eliot@massivelop.com. Also, please let me know if there’s some important information that I glided over here or something that seems to have been underexplained; I’m doing my best to cover a whole lot of ground in a fairly small amount of space. I’ll be back next week and moving right along with my advanced job of choice.


