

Preparation in a nutshell
When you’re gathering your 10 raid squad members, I highly recommend selecting characters who are equipped with Ascended weapons and trinkets (Exotic armour should be fine for this fight if your players are solid with the professions they’re bringing) and have unlocked the relevant elite specialization, and players who have gained the Blazing Speed Mushrooms mastery to capitalise on the potential DPS increase offered by the ‘shrooms. I most definitely think that all 10 players should ideally play on their main toons unless the group is having trouble filling a certain role or you have players that are equally competent with several of their professions. Remember that everyone needs to pull his or her own weight!
The squad composition should resemble the following setup: One tank (must have the highest Toughness, prioritise survivability over DPS), one healer (Druids do particularly well here), three condi DPSers (think Engineers and Necromancers), and five all-out DPSers to fill that should include amazing glass-cannon types such as the Chronomancer and hard-hitters such as the Phalanx Strength Warrior. Don’t forget to think about boon stripping ability and crowd control coverage when you’re creating your raiding squad.
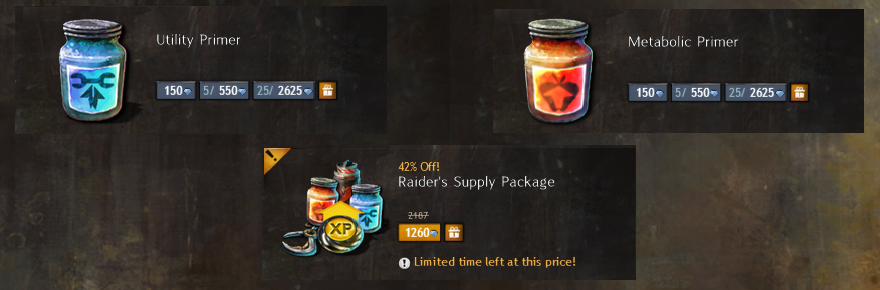
Raiders will make constant use of food and consumables, so don’t neglect this area when you’re tackling the first boss. For those who can afford the cost, Utility Primers and Metabolic Primers are handy to have. The physical DPS should make use of Potent Superior Sharpening Stones and should eat a Bowl of Sweet and Spicy Butternut Squash Soup as a general rule, though boon-heavy folks might prefer to use the Bountiful Sharpening Stone and boon-oriented food choices instead. Condi DPSers should eat some Rare Veggie Pizza and use Toxic Focusing Crystals, and healers should chow down on some Delicious Rice Balls alongside using Furious Tuning Crystals. Tanks should simply pick the DPS consumables that match their native damage type.
Vale Guardian’s vital statistics
The Vale Guardian has 22 million hitpoints and two split phases occur at both 66% health and 33% health. The encounter is divided into five distinct phases, and there is an enrage timer set at eight minutes, after which point the boss will deal 200% more damage. Each enemy mechanic has its own timer too, with the breakbar AOE coming every 30 seconds, the sector change and red orbs popping every 20 seconds, green circles every 15 seconds, and blue circles every 10 seconds (with a two second detonation delay). I’ll explain each of those functions below, but I wanted to drive home that the fight is pacey and requires solid management before I get into the mechanics and phases.
Understanding the colourful boss attacks
Having a solid understanding of the orb and circle mechanics before I outline each phase will give you a much better grasp of the combat overview and will make the later descriptions much easier to follow, so read closely! If you’re having “unexplained” wipes in which you’re confused as to what’s taking down your squad, chances are you’re missing something about the orb and circle management, so do check back here if you’re having problems.
Red seeker orbs are floating points of red light that spawn every 20 seconds in the vicinity of the coloured pylons. These pesky little blighters move toward players and deal a heavy amount of damage, so you’ll want to use knockback or immobilisation abilities to manage them. Pay particular attention to those that are gravitating towards players who happen to be standing in the green circles since those players’ safety is paramount to preventing wipes.
Green lightning circles are flat, bright telegraphs that spawn randomly in the boss’ current sector every 15 seconds. You need to pile four raid members into these circles within the next six seconds or so to negate significant, party-wiping raidwide damage: Each person who makes it into the green circle will successfully negate a quarter of the total potential damage. Downed players won’t count in this total, so be careful when you’re stacked in there and quickly pick up a circle stacker if he or she should fall to prevent damage. As you can imagine, you’ll want to save your red orb knockbacks for those that approach green circle stackers. It’s handy to know who should stack to prevent overkilling and wasting manpower and DPS, so assign a green team of four or five ranged players to solely hande green circles. Save heals for detonation: The green team will take moderate damage right about then.
Blue teleportation orbs are small, flat telegraphs that spawn under melee-ranged players every ten seconds. After two short seconds these circles explode, dealing moderate damage to players still within the circle and teleporting them to a random spot. Players should quickly dodge, block, evade, or simply sidestep out of range to prevent unnecessary damage and being taken out of combat temporarily. The boss has a clear tell when he’s casting: He’ll turn away from your tank, which is much easier to spot than the tiny telegraphs.
The encounter’s phases explained
Phase one: DPS like crazy!
The boss’ main attack is a fairly straightforward melee cleave, and he’ll hone in on your tank straight away. A good bit of advice is to let the tank position the Vale Guardian before damaging him because the encounter timer only starts when the first bit of damage is inflicted. To keep your melee squaddies out of cleaving range, the tank should face the boss away from the party near the blue pylon. This will put you in a great position for grabbing the speed mushrooms to maximise DPS. Pump as much damage into him as you can at this stage — the fight only gets more challenging from here! You’ll want this phase to be over and done with after about a minute, ideally with no more than 90 seconds down.
Phase two: Split one
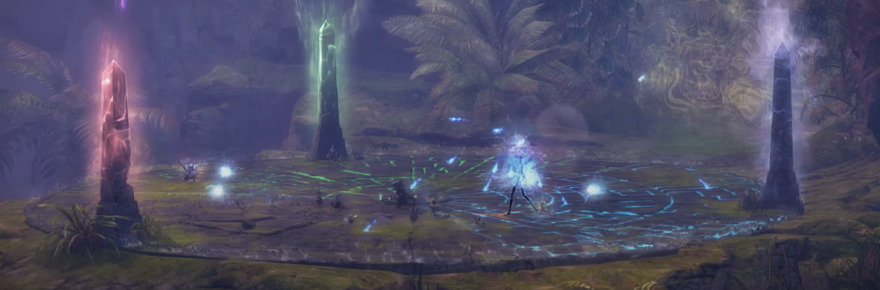
The first phase transition triggers once the boss’ health pool is down to 66%, and the Vale Guardian will become invulnerable before disappearing in a crazy magic trick complete with lightning-beam awesomeness. He will then split into the three coloured guardians that you’ll have fought before this bossfight, and each will need to be dealt with in much the same way. Use the fancy split transition downtime to get into position: place your condi DPSers on the red pylon, your physical DPSers on blue, and then stack the remaining squaddies (including the tank) on green. Each player will then be attuned to his or her respective area and will take significant damage should they venture into another sector.
The aim is to take down the Guardians as quickly as possible while also controlling the sector’s associated orb or circle. Red team need to watch out for seekers, green team will have to avoid the teleporters, and blue team will face lightning circles and will have the added challenge of boon stripping the Blue Guardian too. The fight isn’t over at zero health, and you’ll need to smash through a breakbar to finally down the Guardian. In my experience, blue was the quickest to die, and my blue team were then able to move onto green with a little healing assistance and clever tanking. The tank can drag the Green Guardian to the blue/green intersection after the Blue Guardian falls, allowing the physical DPSer blue team to get damaging without stepping across into an unattuned sector.
Phase three: danger zones
This phase is all about rotational movement across the sectors, so any Warriors should pop their banners in the centre of the circular combat zone. This phase will see the Vale Guardian’s health drop from 66% to 33%. Every 20 seconds, a nasty AoE will cover a specific coloured sector, starting at green. The rotation then goes to blue and ends on red before repeating as needed. Be especially careful when avoiding the teleporters because landing in a hostile sector can seriously hurt!
Starting in the red sector and dragging clockwise is a good place to start since you’ll always stay one sector ahead of the hostile zone. You’ll need to watch your step here and have your tank drag the boss quickly to the sector intersection so you can quickly hop across before the switch. Try to move a few seconds before you need to: This will prevent a green spot spawning in a newly hostile zone, meaning that players risk death trying to stack in it.
To add to the hot footwork, the Vale Guardian will stop following the tank in order to gain a breakbar every 30 seconds that allows him to pour AoE lightning orbs out into the raid. This is a quickfire breakbar that you’ll need to smash in just a few seconds so that you don’t get caught out with lightning circles in a new danger zone due to not being able to move the boss while he has the breakbar up.
Phase four: split two
This is much the same as the first split and occurs when the Vale Guardian hits 33% of his total health pool. Try to slow DPS if a lightning circle is up and you’re close to the phase switch: If you have lightning spots up, the people on the lightning spot may not have time to get properly attuned to their normal assignments. If this does happen to you, organise any changes over whatever communication channel you use quickly, remembering that the Blue Guardian needs boon strippers and the Red Guardian can only be damaged by condition DPS.
Phase five: the final push
If you’ve managed to hang on until now, well done! There are no new mechanics in this phase, but the difficulty ramps up another notch. There are two danger zones to avoid instead of one, and the breakbar and rotation timing is even more critical than before. I have a few tips for fixing problems that arise, but I have to note that even small mistakes in this phase can make the difference between success and failure. If the boss is frozen in a danger zone due to his breakbar, don’t break it! Rather, rotate around the arena to avoid the danger until a minute passes and it naturally breaks or you get back to his sector being the safe zone. The Vale Guardian cannot spawn lightning circles while in his breakbar state, so you’ve less risk too.
While we’re on the subject of lightning circles: If a lightning circle spawns within a danger zone, you’re better not risking your four players to the zone. Instead, stack up with all of your protection boons and heals at the ready and ride through the full brunt of the damage if you can. This is doable if you’ve topped up your health pools in advance. Good luck!
Over to you!
Have you downed the Vale Guardian yet? What was your party composition? Did you do anything differently? What did you think of the encounter? Let me know in the comments!
 Tina Lauro has been playing Guild Wars 2 since it launched and now pens the long-running Flameseeker Chronicles column, which runs every other Wednesday and covers everything from GW2 guides and news to opinion pieces and dev diary breakdowns. If there’s a GW2 topic you’d love to see covered, drop a comment Tina’s way or mail her at tina@massivelyop.com.


