

I’ve expressed my misgivings about Final Fantasy XIV‘s first major post-expansion patch before. It wasn’t terrible, but it didn’t really hook me in like the expansion proper had managed to. But here we are after the second patch, and… yeah, this is a lot better. Not perfect by a long shot, but even most of the things that would usually trigger my carefully cultivated rant gene are at least comprehensible-moving-toward-smart. It’s a good patch, in other words.
I haven’t yet quite experienced everything on display in the patch – as I write this, I’m halfway through Alexander Midas, so it’s quite possible that A8 will make me hate my job and the game. (Although I doubt it, for many reasons.) Still, there’s plenty to talk about with what’s already in place, so let’s start off at the beginning and move along and even include dungeon boss overviews, for those who care about that sort of thing. (I am one of them.)
The Antitower
First Boss: When you get turned into a frog, run around the perimeter of the arena while the non-frogged people kill the adds. It helps to determine clockwise or counterclockwise beforehand so you aren’t running into one another’s AoEs.
Second Boss: Kill the Stardust quickly when it spawns, prioritize it over the little spriggans. If the boss targets you, hide behind boulders to avoid getting hit; put some distance between yourself and the boulders to avoid taking damage when they blow up.
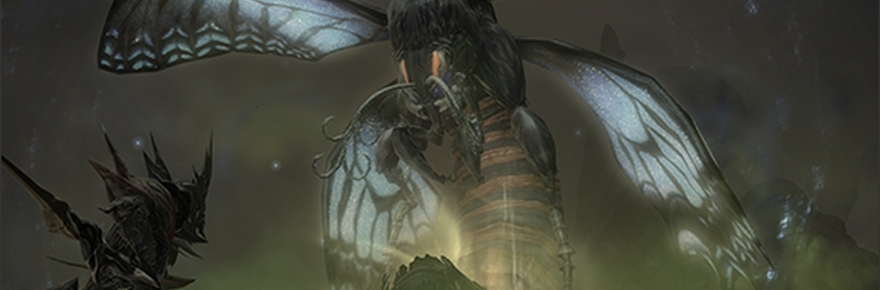
Third Boss: Hooray, horrifying boss from a horribly bland previous game! Kill the little dolls quickly (they’re not tanked). The main boss will periodically turn two people into dolls, so kill those dolls quickly as well. If you get an eye icon over your head, point the conal AoE away from the group and face away from the boss as it’s a gaze attack. When she uses Brace, move in front of her to attack.
Overall: It’s another main scenario dungeon, and those are usually pretty straightforward. Honestly, I find the second boss kind of tedious; he’s not hard, exactly, but if you have bad luck and melee DPS you can wind up beating on him for a while. The flavor is pretty cool, though, and it’s free of any massive irritants.
Lost City of Amdapor (Hard)
First Boss: When it starts using Neuro Squama, everyone should face outward from the edge of the arena until the cast finishes; that completely nullifies the conal AoEs coming from your duplicates. Other than that, dodge the obvious bad stuff.
Second Boss: Pretty fun! The Ancient spells that the boss casts leave little mines on the ground; left alone, they’ll explode for party-wide damage. He’ll also place elemental debuffs on the party. The result is pretty obvious – if he casts Ancient Stone, anyone with Wind Resistance Down should run into the resultant mine and pop it so that it doesn’t deal any major damage. Kill the little orb that pops up when he goes to cast Ancient Holy and take care of the adds afterward.
Third Boss: A bit lengthy, but not too hard. First time around, all of her spells are heals, so just drag her out of her Regen field and kill her. When she comes back, all of her heal spells are reversed; run as far away from her as possible when she uses Cure IV and don’t stand in her Regen field. The third time around, she swaps back and forth while summoning decoys – the healing decoy gives her an automatic regen, while the damage decoy bleeds and debuffs a player. Kill the decoys fast and remember her mechanics from the first two resurrections.
Overall: A bunch of Final Fantasy XI references packed into a dungeon that’s really Holy-themed, how often do you see that? The dungeon isn’t terribly difficult either, although the group can wipe easily if people are distracted on the first boss. I still enjoyed it immensely, and it’s hard to pick whether this one is better or worse than Antitower. It’s a nice gathering for an Expert roulette, though.
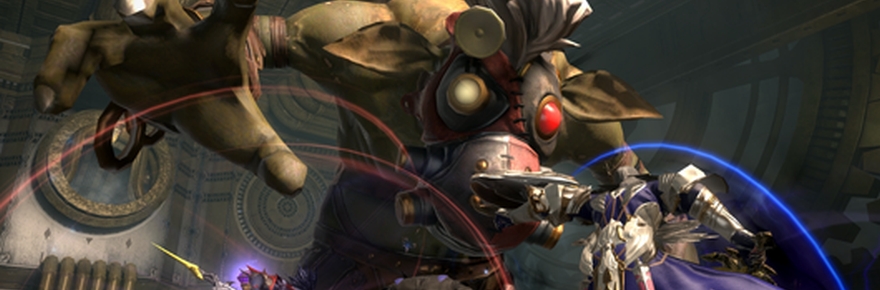
Alexander Midas
On this I’m not going to write guides, as I relied upon this guide to steer me through a full run and shan’t claim prior knowledge or experience. I’m glad I didn’t go into these blind, really, but I always prefer not going in blind.
Alexander Midas actually fixes a lot of the issues that I had with Alexander Gordias – the fights on a whole feel far less gimmick-focused and more centered around solid mechanics. Where A2 was a matter of fighting waves of enemies, a mechanic I usually find to be a bit lazy, A6 is a gauntlet against a series of mini-bosses, each of which has one major mechanic. A8 could easily be a disjointed mess, especially on the separate and recombine phase, but instead it’s just a matter of layering mechanics you understand in divergent ways.
I will freely admit that part of my love for this is the fact that the robots involved are very clear nods to the Combaticons, at that.
The other big element to Alexander Midas is the fact that you have to clear Normal mode to get one of the items required to eventually get a high-capacity tomestone. Originally, I was all set to rant about this, but it takes seven items to get a high-capacity tomestone, which means that this restriction isn’t a matter of needlessly forcing content – it’s a way of making sure that people won’t be running around with weapons above 210 for a while. Not the most elegant possible solution, but it does work, and I can definitely identify positively with the design principles at work.
So, hey, it’s motivation to actually clear this content instead of letting it lie fallow, which was long the case for Gordias. And the fights themselves are more fun and less reliant on brute force, at least thus far. A win.
Containment Bay S1T7
There’s some cool mechanics on display in this fight, but as I feared it’s really something you do once and then largely forget about. There’s not much else to recommend it. So it’s not bad, but it kind of fills a need no one actually needed. That being said, the lore involved is quite interesting, so I can’t exactly give it a pass based on that.
As for the extreme mode… well, I don’t really care for extreme modes as it is, so I’m not tremendously invested in that. The weapons look moderately cool, at least, but I’d really like to see those skins start being available through other means. (Perhaps in the next expansion, considering the Allagan skins we got in this patch.)
Main Scenario
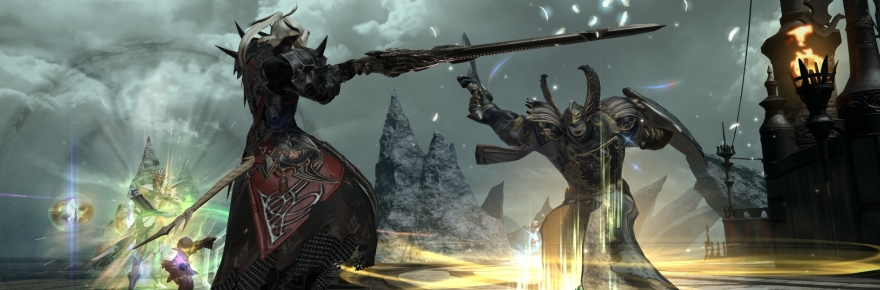
It struck me on my second time through that this patch has a very brief main scenario. Seriously, you blink and you miss it; the vast majority of what happens is in cutscenes rather than being involved in actual gameplay. Normally I might be annoyed by this, but the gameplay that is on display is usually good, and the fact that the cutscenes themselves are good covers a multitude of sins.
One of the big elements that’s been running through this whole story is sad inevitability, that all of the wishing and struggling of the various character involved doesn’t matter when you have to face the simple reality of the Dragonsong War. There’s a sense of events moving toward an inevitable but still heartbreaking conclusion, characters who were always doomed to be enemies eventually no matter what their intentions.
I was also far more satisfied by this patch’s returning Scion. Without spoiling anything, I can say that it manages to drive home the idea that this was always dangerous. The character in question knew exactly what the stakes were from the beginning, and when it came time to pay the price there was no one else. It’s not an ending but a reminder that everyone lost something at the end of the 2.x series.
Also, I would love to see more battles in the style of the big centerpiece battle. The one-on-one fight wasn’t all that interesting to me, but the push and pull before that and the need to stay aware and mobile? That was pretty darn cool.
Of course, there’s more to talk about with this patch, and I haven’t even touched upon some of the changes that make me happy. So, that’s something to look forward to for the next column. For this week, you can feel free to mail feedback to eliot@massivelyop.com or leave it in the comments down below. Please, be mindful of spoilers, as some people have not finished the MSQ yet!
 The Nymian civilization hosted an immense amount of knowledge and learning, but so much of it has been lost to the people of Eorzea. That doesn’t stop Eliot Lefebvre from scrutinizing Final Fantasy XIV each week in Wisdom of Nym, hosting guides, discussion, and opinions without so much as a trace of rancor.


